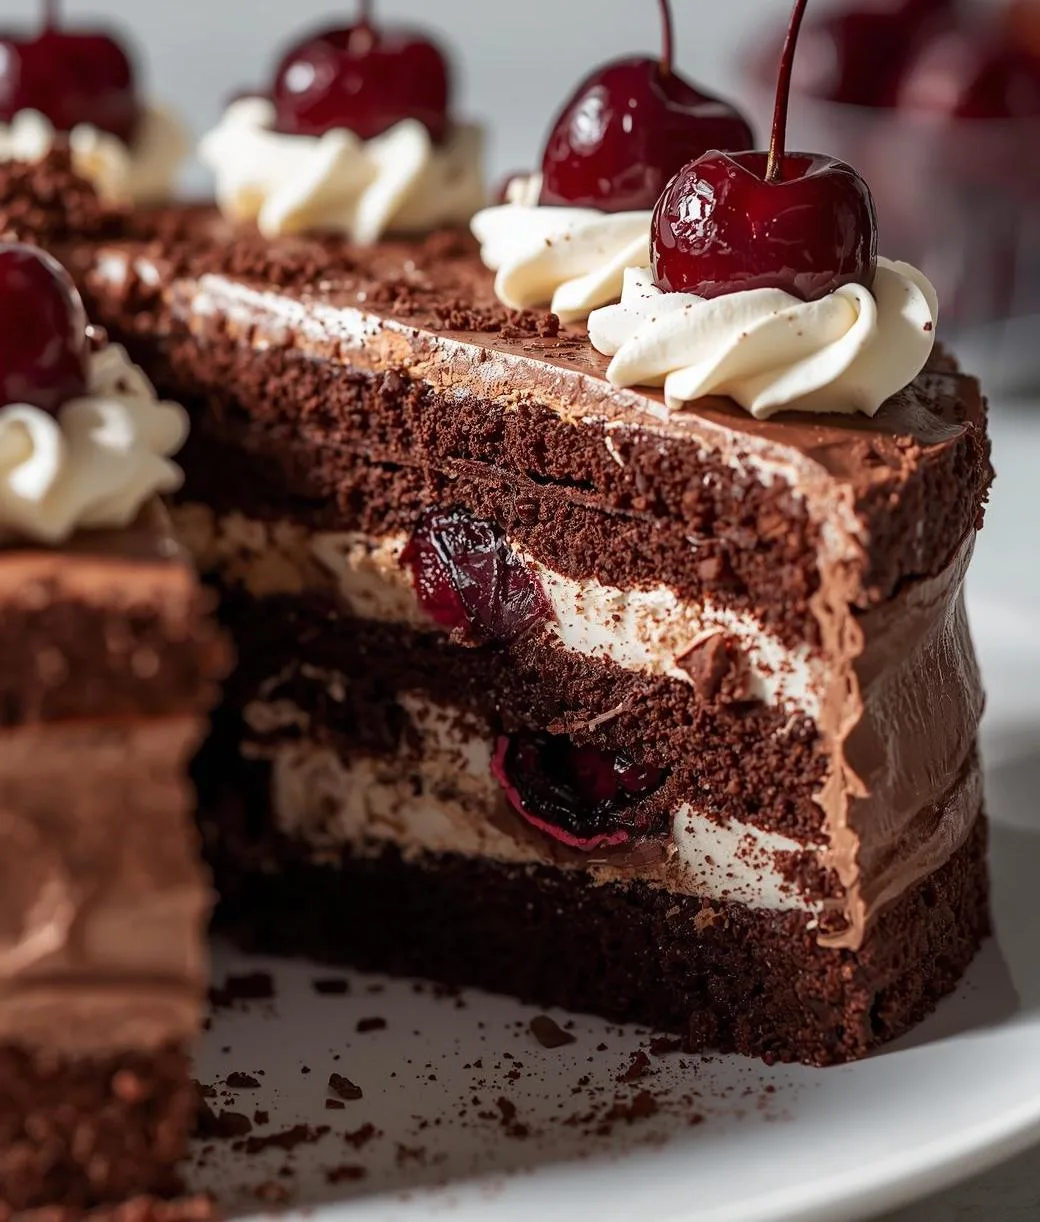
Imagine sinking your fork into a slice of soft, fluffy cake layered with rich chocolate sponge, sweet cherries, and clouds of whipped cream. That’s the magic of a Black Forest Cake—a dessert that feels like a celebration in every bite! It’s creamy, chocolatey, and delightfully fruity, making it the perfect treat for birthdays, holidays, or just because you deserve something special.
This German classic, known as Schwarzwälder Kirschtorte, has captured hearts around the world with its irresistible mix of textures and flavors. Fun fact: the cake gets its name from the famous Black Forest region in Germany, where cherry brandy (Kirschwasser) originates!
What makes this cake so special is its balance—the light whipped cream offsets the rich chocolate layers, while the cherries add a sweet-tart pop. Plus, it’s simpler than it looks! With just a few easy steps, you can create a bakery-worthy masterpiece right in your kitchen.
If you’ve tried my Chocolate Coconut Layer Cake, you’ll love this one even more—it’s creamier, lighter, and bursting with cherry flavor. So, grab your whisk, preheat your oven, and let’s uncover the seven secrets to baking the perfect Black Forest Cake that will wow your family and friends!
What is Black Forest Cake?
Ever wondered why it’s called Black Forest Cake when it’s not actually black or made from a forest? The name is a playful nod to the German Black Forest region, famous for its dark cherry liqueur used in the recipe. Legend has it that a local baker first combined cherries, cream, and chocolate to honor the area’s signature flavors—and the rest is dessert history!
It’s a fun reminder that sometimes the best recipes come from creativity (and a sweet tooth). As they say, the way to a man’s heart is through his stomach, and this cake proves it true every time! Ready to impress someone special—or just treat yourself? Then roll up your sleeves and bake your very own Black Forest Cake today!
Why You’ll Love This Black Forest Cake
There are plenty of cakes out there, but this Black Forest Cake stands out for three delicious reasons:
- Creamy, Fluffy, and Irresistibly Chocolatey
Every bite blends rich chocolate sponge with velvety whipped cream and juicy cherries. It’s the perfect balance of light and decadent—like dessert heaven on a plate. - Homemade is Always Better (and Cheaper!)
Why spend a fortune at a bakery when you can make this at home for a fraction of the cost? Plus, you control the sweetness, the creaminess, and how generous you want to be with those cherries! - Toppings That Make It Shine
From shaved dark chocolate curls to glossy maraschino cherries, every topping turns this dessert into a showstopper. It’s elegant enough for a party, yet simple enough for a cozy weekend treat.
If you loved my Chocolate Chip Cinnamon Roll, this cake will absolutely steal your heart—same comforting sweetness, but with an elegant twist. Go ahead and give it a try—you’ll be surprised how easy it is to make your kitchen smell like a European bakery!
How to Make Black Forest Cake
Quick Overview
This Black Forest Cake is easier than it looks! It takes about 1 hour and 15 minutes from start to finish. With soft chocolate sponge layers, whipped cream frosting, and sweet cherries, it’s a dream dessert that looks stunning and tastes even better.
Key Ingredients for Black Forest Cake
Here’s what you’ll need to bring this masterpiece to life:
- 1 ¾ cups all-purpose flour
- ¾ cup unsweetened cocoa powder
- 2 tsp baking powder
- ½ tsp baking soda
- 1 cup sugar
- 4 large eggs
- 1 cup buttermilk
- ½ cup vegetable oil
- 1 cup cherry syrup (from canned cherries)
- 2 cups heavy whipping cream
- ½ cup powdered sugar
- 1 tsp vanilla extract
- 1 ½ cups pitted sweet cherries (fresh or canned)
- Dark chocolate shavings (for garnish)
- Maraschino cherries (optional, for topping)
💡 Pro Tip: For a more authentic taste, drizzle a little Kirsch liqueur (cherry brandy) on each cake layer before assembling.
Step-by-Step Instructions
Step 1: Prepare the Chocolate Cake Layers
Preheat your oven to 350°F (175°C). Grease and line two 8-inch round cake pans with parchment paper. In a bowl, whisk flour, cocoa powder, baking powder, and baking soda.
Step 2: Mix Wet Ingredients
In another bowl, beat the eggs and sugar until fluffy. Add oil, buttermilk, and vanilla. Slowly mix in the dry ingredients until smooth.
Step 3: Bake the Cakes
Divide the batter evenly between pans and bake for 25–30 minutes. Check doneness with a toothpick—if it comes out clean, they’re ready! Let the cakes cool completely.
Step 4: Whip the Cream
Beat heavy cream, powdered sugar, and vanilla until stiff peaks form. Keep chilled until assembly time.
Step 5: Assemble the Cake
Place one cake layer on a plate and brush with cherry syrup. Spread a layer of whipped cream, then add cherries. Repeat with the second layer. Frost the entire cake with remaining whipped cream.
Step 6: Decorate
Top with chocolate shavings and maraschino cherries for that signature look. Chill for at least 1 hour before serving.
And voilà—you’ve got the perfect Black Forest Cake, creamy and light with every forkful!
What to Serve Black Forest Cake With
Pair your Black Forest Cake with:
- A cup of espresso or cappuccino for a rich contrast.
- A scoop of vanilla ice cream for extra creaminess.
- A glass of sparkling cherry soda or red wine for an elegant dessert pairing.
You can even serve smaller slices alongside mini desserts like Strawberry Cheesecake Milkshake or White Chocolate Mousse Tart for a dessert buffet everyone will love!
Top Tips for Perfecting Black Forest Cake
- Don’t overmix the batter – This keeps your cake layers fluffy and tender.
- Chill your mixing bowl and beaters before whipping cream for best results.
- Use real cherries if possible – fresh or canned in syrup both work beautifully.
- Add texture with dark chocolate curls or chocolate bark pieces.
- Avoid sogginess by brushing cake layers lightly—don’t over-soak with syrup!
These small tweaks make a big difference between a good cake and a show-stopping Black Forest Cake!
Storing and Reheating Tips
- Refrigerate: Store leftovers in an airtight container for up to 3 days.
- Freeze: You can freeze individual slices for up to 1 month. Wrap tightly in plastic wrap and place in a freezer bag.
- Thaw: Let frozen slices thaw in the fridge overnight before enjoying.
- Re-whip the cream slightly before serving if it softens over time.
FAQ About Black Forest Cake
1. Can I make Black Forest Cake without alcohol?
Absolutely! Just skip the cherry liqueur and use cherry syrup—it’s just as flavorful.
2. Can I use whipped topping instead of real cream?
You can, but fresh whipped cream gives the best flavor and texture.
3. How do I make a vegan version?
Replace eggs with flax eggs, use plant-based cream, and non-dairy milk for an amazing vegan Black Forest Cake!
The Black Forest Cake is more than just a dessert—it’s a classic that brings joy, nostalgia, and a touch of European charm to your table. With its perfect blend of chocolate, cream, and cherries, it’s a treat everyone will fall in love with.
Whether you’re baking it for a birthday, a dinner party, or just a cozy weekend, this cake will never disappoint. Try it once, and you’ll understand why it’s loved around the world.
So, are you ready to bake your own slice of bliss? Get your ingredients, follow the steps, and let the magic of Black Forest Cake fill your kitchen today!
If you’re planning a dessert spread, it also pairs beautifully with Mini Caramel Peanut Cheesecakes or Strawberry Crunch Cheesecake Bites.
1 thought on “Black Forest Cake: 7 Secrets to the Best Creamy, Fluffy Layers”