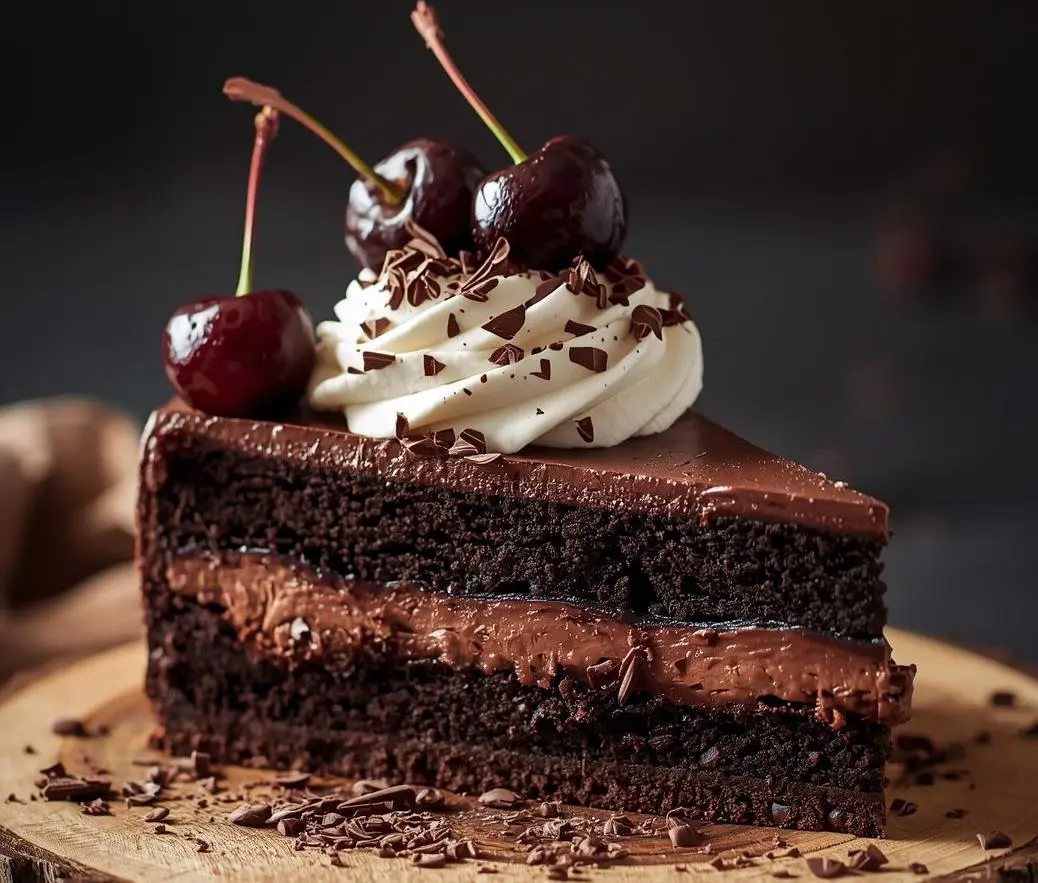
If you’ve ever dreamed of sinking your fork into a dessert that’s creamy, rich, and utterly irresistible, then this Black Forest Cheesecake is your next baking adventure! Imagine layers of velvety chocolate cheesecake topped with juicy cherries and a cloud of whipped cream—it’s like the classic Black Forest Cake met its creamy cheesecake cousin.
The best part? This dessert looks like something straight out of a bakery window, yet it’s surprisingly simple to make at home. With just a few everyday ingredients and three easy steps, you can impress your family or guests without breaking a sweat. It’s the perfect showstopper for birthdays, holidays, or cozy weekend indulgence.
Here’s a fun fact: the original Black Forest dessert, Schwarzwälder Kirschtorte, hails from Germany’s Black Forest region, known for its cherries and kirsch (cherry brandy). This cheesecake version takes those same delicious flavors and turns them into a smooth, chocolatey delight that melts in your mouth.
If you loved my Chocolate Coconut Layer Cake, you’ll find this cheesecake even more satisfying—it’s just as decadent but creamier and quicker to make. So, grab your mixing bowl, and let’s create a dessert that’s rich, dreamy, and unforgettable!
What Is Black Forest Cheesecake?
Ever wondered why it’s called Black Forest Cheesecake? No, it’s not because there’s a forest in your oven (though that would be cool!). The name comes from Germany’s famous Black Forest region, where the classic cake—with chocolate, cherries, and whipped cream—was born. Someone had the brilliant idea to combine those same flavors into a cheesecake, and voilà—dessert magic happened!
This recipe is proof that “the way to a man’s heart is through his stomach,” especially if chocolate and cherries are involved. With every creamy bite, you’ll taste why this dessert has become a worldwide favorite. So, ready to bake your way into dessert bliss? Go ahead and make this Black Forest Cheesecake today—it’s happiness on a plate!
Why You’ll Love This Black Forest Cheesecake
There’s so much to adore about this Black Forest Cheesecake, from its silky texture to its deep chocolate flavor. Here are three irresistible reasons to make it today:
- Pure Chocolate Indulgence: Every bite is rich, creamy, and loaded with cocoa flavor, perfectly balanced by the tart sweetness of cherries. It’s like the best parts of chocolate cake and cheesecake rolled into one.
- Budget-Friendly Bliss: Skip the pricey bakery slices—this homemade cheesecake delivers gourmet flavor at a fraction of the cost. Plus, it’s made with simple pantry ingredients, so no fancy shopping required.
- Topping Heaven: The luscious cherry pie filling and fluffy whipped cream turn this dessert into a masterpiece. Add a sprinkle of chocolate shavings for that extra touch of elegance.
If you enjoy my Chocolate Cheesecake Cupcakes, you’ll love this even more—it’s creamier, taller, and made for sharing. So preheat your oven and treat yourself to something spectacular. You deserve it!
How to Make Black Forest Cheesecake
Quick Overview
Making this Black Forest Cheesecake is easier than it looks! In just 3 simple steps, you’ll create a creamy chocolate base, top it with cherries, and finish with light, whipped cream. From prep to cooling, it takes about 1 hour and 15 minutes, making it the perfect weekend baking project.
This cheesecake is smooth, chocolatey, and baked to perfection—no water bath needed! Just follow the steps below, and you’ll have a bakery-worthy dessert on your table in no time.
Key Ingredients for Black Forest Cheesecake
For the Crust:
- 1 ½ cups chocolate cookie crumbs
- ¼ cup melted butter
- 2 tbsp sugar
For the Cheesecake Filling:
- 24 oz cream cheese, softened
- 1 cup sugar
- ¾ cup sour cream
- ½ cup unsweetened cocoa powder
- 3 large eggs
- 1 tsp vanilla extract
- ½ cup melted dark chocolate (optional, for richness)
For the Topping:
- 1 can cherry pie filling (or homemade cherry compote)
- 1 cup whipped cream or whipped topping
- Chocolate curls or shavings for garnish
Step-by-Step Instructions
Step 1: Prepare the Crust
- Preheat your oven to 325°F (160°C).
- Mix chocolate cookie crumbs, melted butter, and sugar until combined.
- Press the mixture firmly into the bottom of a 9-inch springform pan.
- Bake for 10 minutes, then let it cool while you prepare the filling.
Step 2: Make the Cheesecake Filling
- Beat the softened cream cheese until smooth and fluffy.
- Add sugar, cocoa powder, and sour cream, mixing until creamy.
- Mix in eggs one at a time, then add vanilla extract and melted chocolate.
- Pour the mixture over the cooled crust and smooth the top.
- Bake for 50–55 minutes, until the center is just set.
Step 3: Add the Toppings
- Allow the cheesecake to cool completely, then refrigerate for at least 4 hours (overnight is best).
- Spoon cherry pie filling on top.
- Add whipped cream around the edges and sprinkle with chocolate shavings.
Slice, serve, and watch everyone’s eyes light up at the first bite!
What to Serve Black Forest Cheesecake With
This decadent cheesecake pairs beautifully with:
- Hot Drinks: Freshly brewed coffee, hot chocolate, or cappuccino.
- Cold Beverages: Vanilla milkshake, iced latte, or cherry soda for a fun twist.
- Sides: Serve with chocolate-dipped strawberries or a scoop of vanilla ice cream for an extra treat.
For a full dessert spread, try pairing it with my Mini Chocolate Caramel Cheesecake Bites—they make the perfect mini companions to this showstopping cheesecake!
Top Tips for Perfecting Black Forest Cheesecake
- Room Temperature Ingredients: Always use softened cream cheese for a smooth, lump-free batter.
- Don’t Overmix: Be gentle when adding eggs to avoid cracks in the cheesecake.
- Cool Gradually: Let the cheesecake cool in the oven with the door slightly open to prevent sinking.
- Flavor Boost: Add a splash of cherry liqueur (kirsch) for a traditional touch.
- Decorating Tip: Use a piping bag for a professional whipped cream finish.
These tips ensure your Black Forest Cheesecake turns out bakery-perfect every single time!
Storing and Reheating Tips
- Refrigeration: Store your cheesecake in an airtight container in the fridge for up to 5 days.
- Freezing: For longer storage, wrap individual slices in plastic wrap and freeze for up to 2 months.
- Reheating: Cheesecake is best served chilled, but if you prefer it slightly warm, let it sit at room temperature for 15 minutes before serving.
Pro Tip: Keep the cherry topping separate if freezing, and add it fresh when serving for the best texture and flavor.
FAQ About Black Forest Cheesecake
1. Can I make Black Forest Cheesecake without baking it?
Yes! You can use a no-bake cheesecake base and chill it for 6 hours instead of baking.
2. What’s the difference between Black Forest Cake and Black Forest Cheesecake?
The cake uses sponge layers, while the cheesecake version has a creamy chocolate filling on a cookie crust.
3. Can I use fresh cherries instead of cherry pie filling?
Absolutely! Just simmer fresh cherries with sugar and cornstarch to create a quick compote.
4. How do I prevent cracks in my cheesecake?
Avoid overmixing and let the cheesecake cool slowly in the oven before chilling.
This Black Forest Cheesecake is more than just dessert—it’s an experience. With its silky chocolate layers, sweet cherry topping, and creamy finish, it brings together the best of two worlds: rich cheesecake and classic Black Forest flavor.
It’s simple, elegant, and guaranteed to impress everyone at your table. So whether it’s for a special celebration or a cozy night in, this recipe is your ticket to chocolate-cherry perfection.
Ready to create a dessert that looks as good as it tastes? Roll up your sleeves, preheat that oven, and let this Black Forest Cheesecake become your new favorite showstopper!
1 thought on “Black Forest Cheesecake: 3 Steps to a Rich and Dreamy Treat”